
Controller Input Workaround for Help Wanted 2
Hey folks,
Currently, Help Wanted 2 does not natively support the controller key bindings for some headsets. It also does not support the Steam Link app from the Oculus Store, and as a result inputs do not work - that app released 14 days ago which is why we’re just catching it now. If you’re stuck on the game’s EULA, chances are you’ve run into one of these issues.
We are actively working on a patch for the game to more proactively support some older VR headsets, as well as the Quest through Steam Link.
In the meantime, you are absolutely able to set key bindings yourself via your SteamVR settings, and through the Steam Link app for Quest in order to play the game using the hardware you have. There are two paths forward - looking at community published key bindings inside of your SteamVR settings, or manually setting them yourself. Here are instructions for those options:
Selecting Community Published Key Bindings
Inside of the “Controller Bindings” menu inside of Steam Link or SteamVR, you may see a section for Community Bindings. You are free to try using a configuration published there - at a glance, there are a few that look solid.
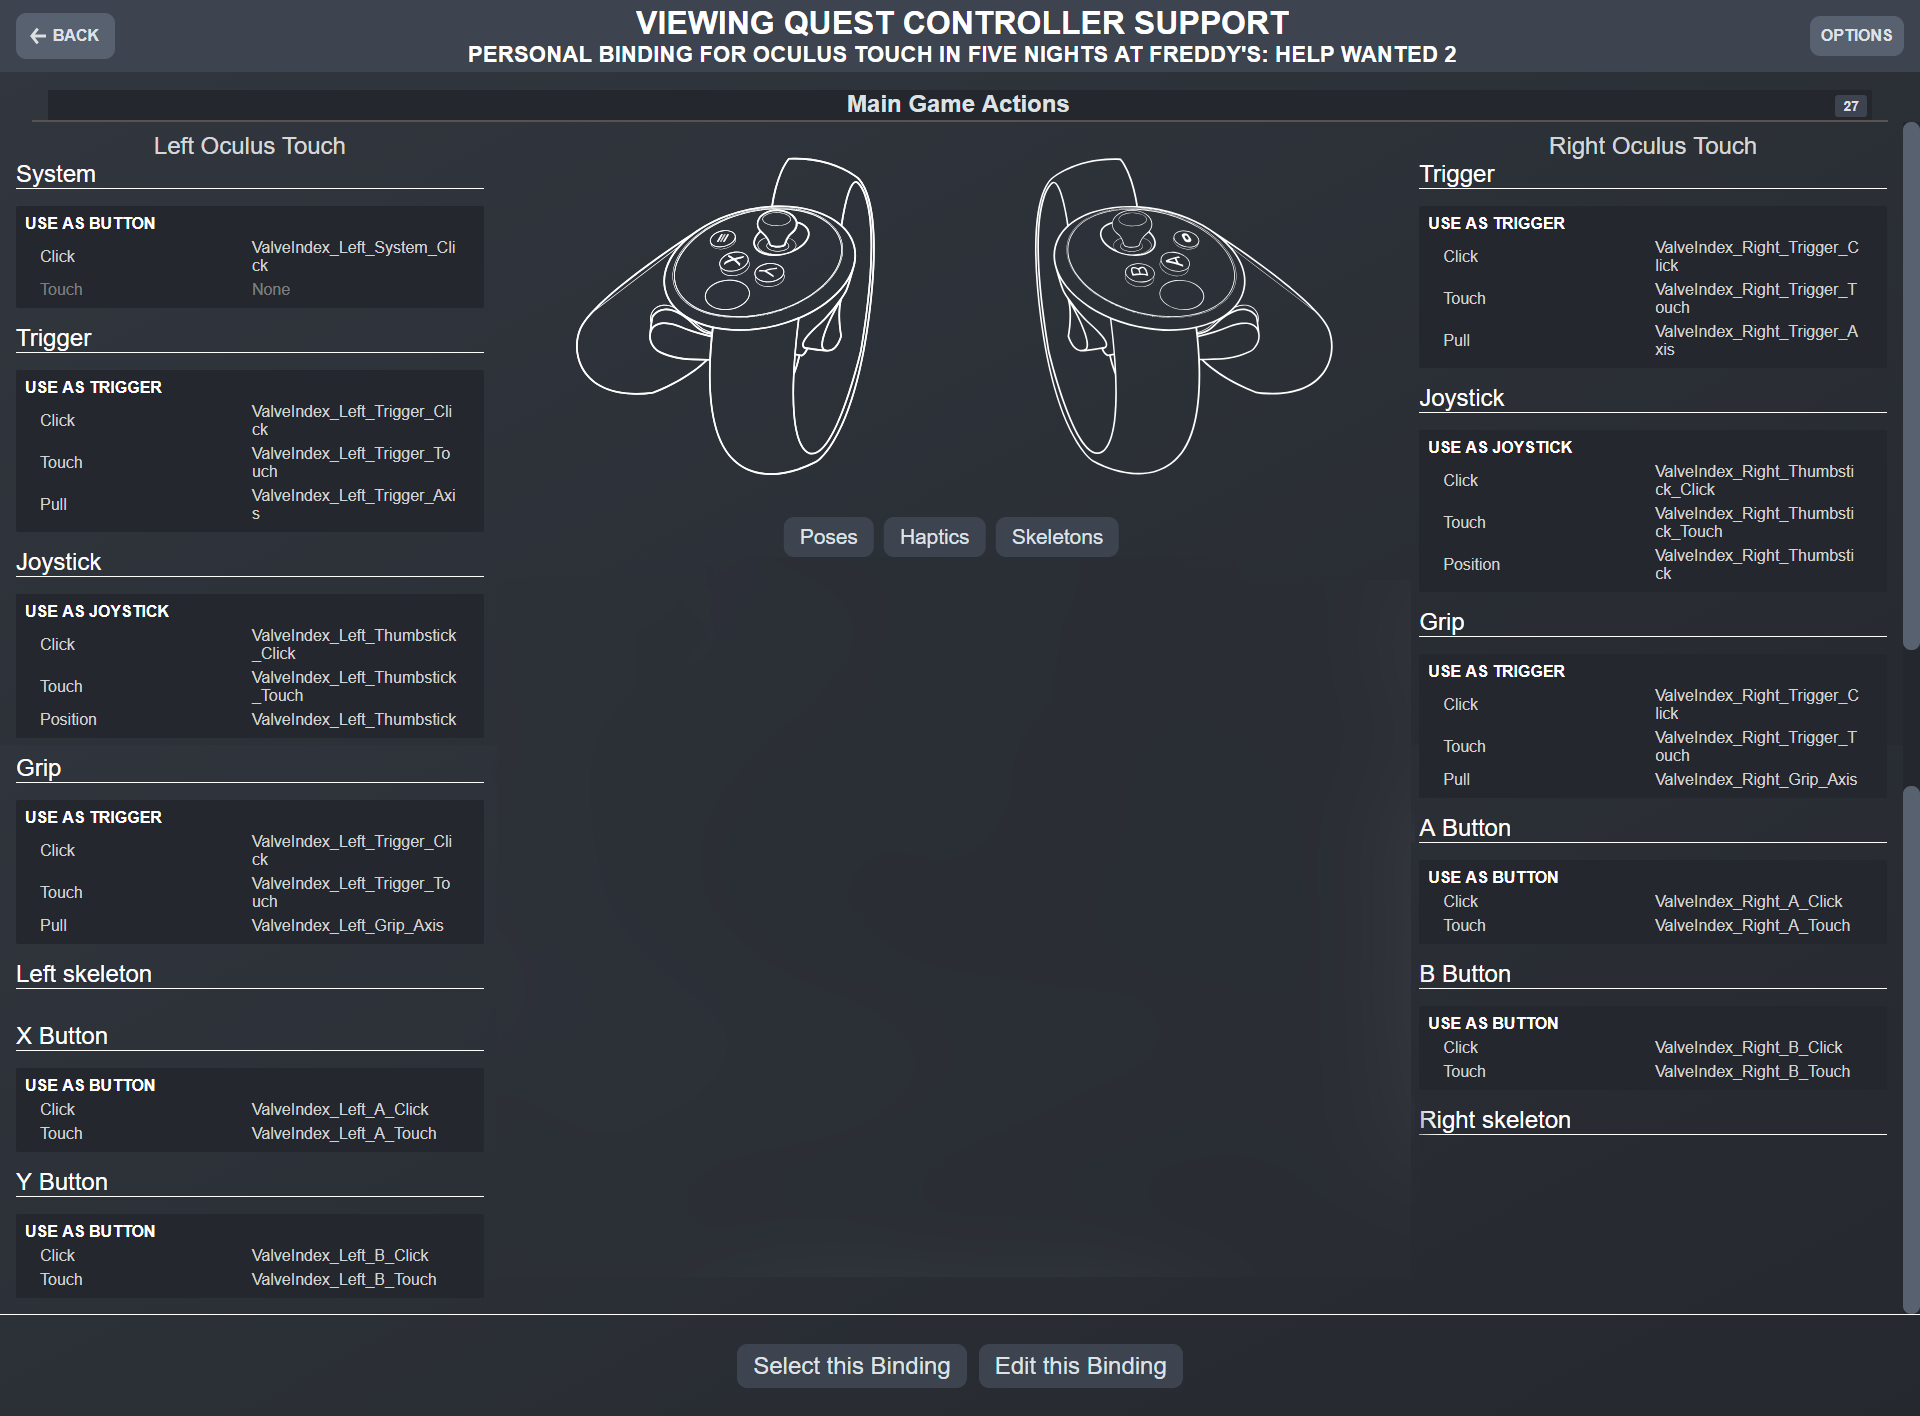
Manually Updating Keybindings for Quest via Steam Link
Launch the Steam Link app from your Quest headset.
Launch "Five Nights at Freddy's: Help Wanted 2" from the Steam interface.
Once in game, press the Options button on the left controller (the "hamburger" button) to bring up the SteamVR menu.
Select "Controller Bindings" from the Steam menu.
Next to "Active Controller Binding," select "Custom".
Under "Current Binding," select "Edit".
Match the bindings to those shown in the following screenshot.
Select "Save Personal Binding" at the bottom of the window.
Name the binding, then select "Save".
Make sure that binding is selected and return to the game!
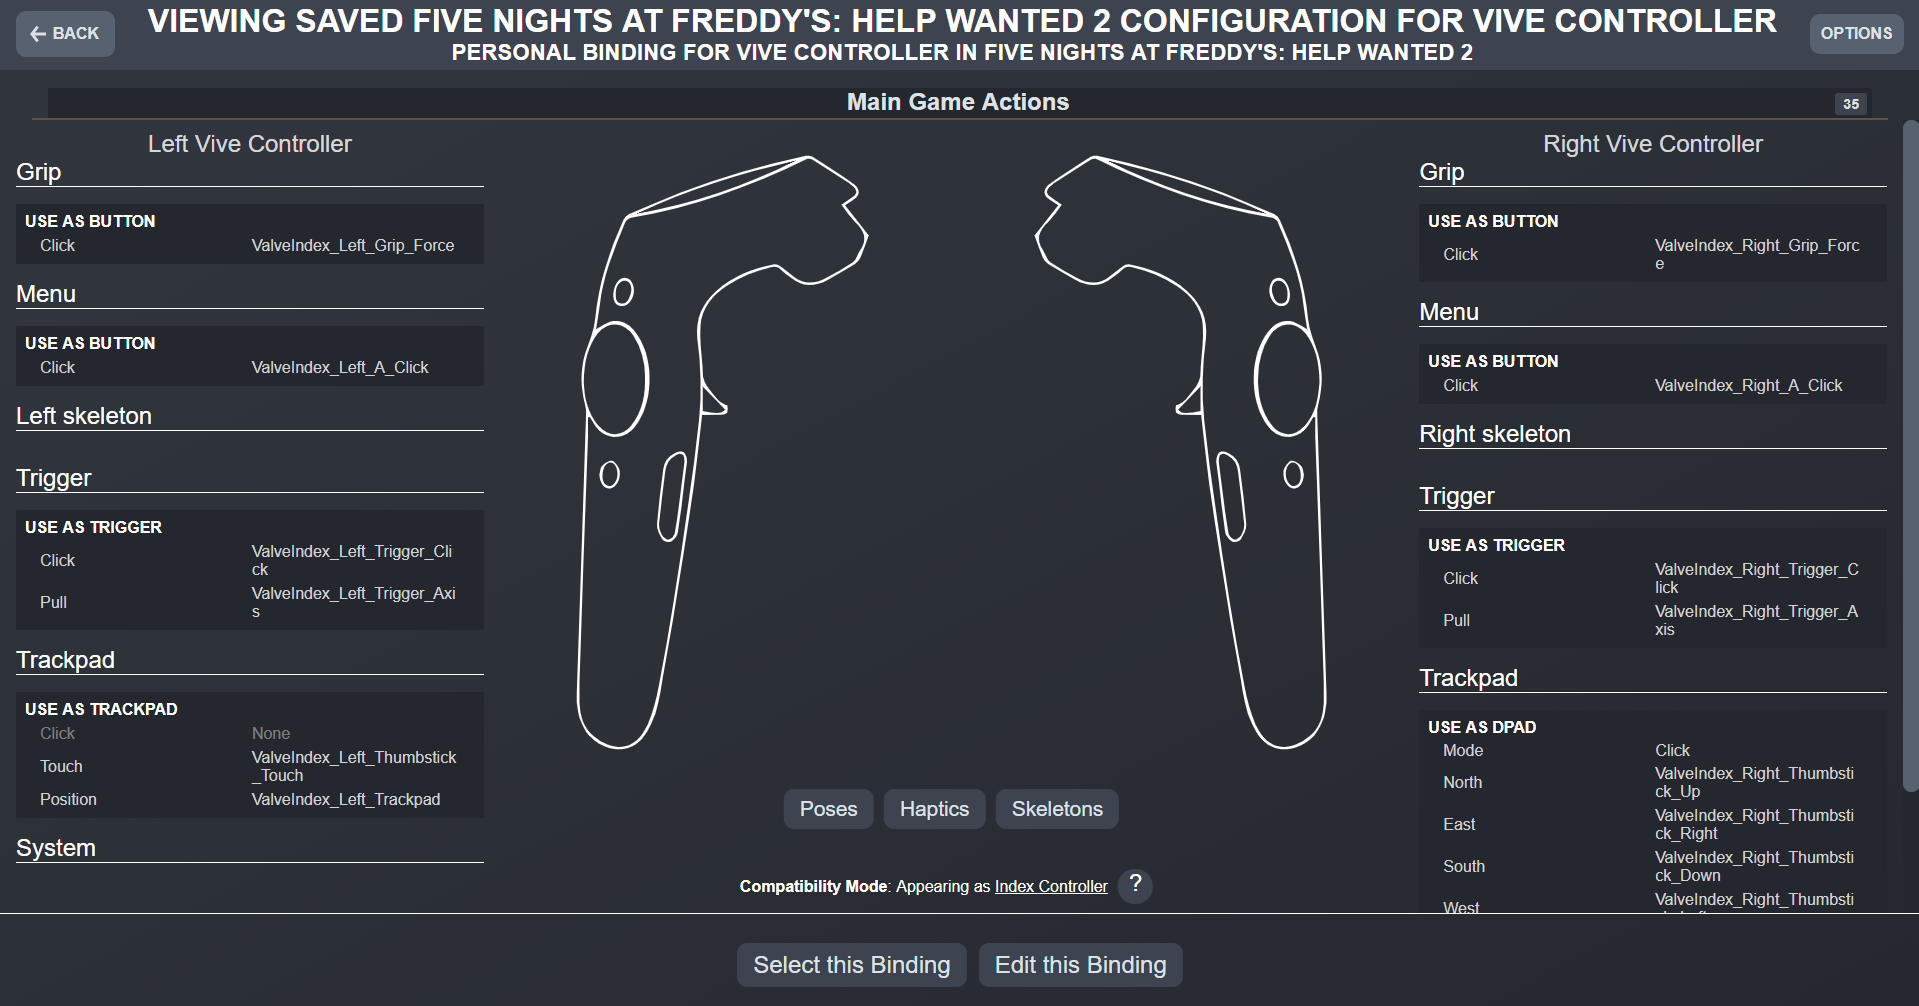
Manually Updating Key Bindings for Vive Users
Launch "Five Nights at Freddy's: Help Wanted 2" from Steam using your Vive.
Once in game, press the System button on the left controller (the "diamonds" button below the touchpad) to bring up the SteamVR menu.
Select "Controller Bindings" from the Steam menu.
Next to "Active Controller Binding," select "Custom".
Under "Current Binding," select "Edit".
Match the bindings to those shown in the following screenshot.
Select "Save Personal Binding" at the bottom of the window.
Name the binding, then select "Save".
Make sure that binding is selected and return to the game!
Thank you!
Steel Wool Studios